Reviving the Past: Transforming a Thrifted Vintage Secretary Desk

Greetings, thrifty friends! I'm pleased to see you here💗 It's time for me to unveil the transformation of my secretary desk. If you follow me on Facebook, you might recall when I purchased it for just $65! After searching for a while, I found this one in better shape and at a lower price point compared to others I had seen on Marketplace. Even though I had originally wanted one without the hutch top, I had planned to detach the top and repurpose it into a spice cabinet.


BEFORE the makeover. It had good bones and is a solid piece, worthy of a new life!

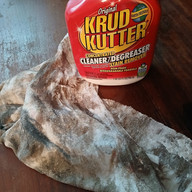
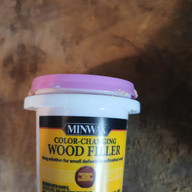
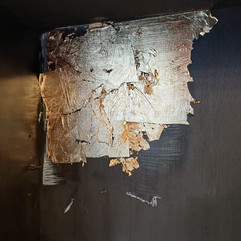
Let's start from the beginning. Upon bringing it home, the first task was to thoroughly clean it with Krud Kutter, even though it didn't appear dirty, the rag revealed otherwise! I checked for any damage and noticed that the finial top was detached, and there was some missing wood in the interior desk area, which I easily repaired using wood putty and a sanding sponge. Originally, the interior should have had a small cabinet with doors, and although the holes for the hinges were still there, I was fine with it as is. Additionally, the key and one small interior knob were missing. The interior also had a significant ink stain, which posed a challenge. The bones of this desk were solid, and I loved the details of the claw feet, which made it the perfect piece to refurbish.


DURING: Wood repair, primer, and paint.
Next, I sanded the interior thoroughly, using sandpapers of varying grit and a sanding block. I applied a total of five coats of primer, but some ink still bled through. I then applied four coats of latex paint, using a combination of brush sizes and a foam sponge to reach difficult areas. Despite the multiple layers, traces of ink remained visible. To address this and add protection, I decided to embrace the imperfections by applying dark wax to the interior. Embracing the flaws of its past life is part of the charm of owning and refurbishing vintage pieces. To create a cohesive look to match my plans for the exterior, I used rub and buff in antique gold on the details and curves, and replaced the small knobs with a new set for added contrast. Additionally, Mr. Thrifty drilled a hole in one of the cubbies to accommodate a power cord.


DURING: paint products used + color, close up of finished interior details.
I have been a follower of Debi's Design Diary for several years and admire the innovative projects she showcases on her YouTube channel. Her work has been a great a source of inspiration for me, and I had the opportunity to meet her in Delaware during a creative workshop in 2017. I have always been intrigued by her *DIY clay paint line, particularly because it vows to be "highly pigmented." For this particular project, I located a retailer in my vicinity and opted for Black Velvet for the exterior and Big Top for the protective sealant. Similar to chalk paint, DIY brand paint requires a top coat of wax or sealant not only to safeguard the finish but also to enhance the richness of the color.
*It is important to mention that I have no affiliation with DIY paint or IOD transfers and do not receive any benefits, perks, or compensation. My views are solely based on my personal experience and honest opinion.
During the painting process, I had doubts because the surface appeared dull and uneven. However, I persisted and trusted the process. The paint coverage was exceptional, and a small amount went a long way! While one coat provided excellent coverage, I opted for two coats for added security. I painted directly over the hardware since I intended to keep it. The paint adhered well to both the metal and the wood, and I didn't sand either surface. To ensure proper preparation for adding transfers and Rub and Buff distressing, I applied Big Top sealer over the entire exterior as should be done before adding any embellishments.


DURING: The UGLY before the PRETTY! This is one coat of the DIY paint. Just TRUST the process!

To add drama I choose an *IOD transfer in Midnight Garden because I was drawn to the peacock design. Despite being new to working with transfers, I found the process quite simple: cut to size, adhere to your piece, and rub the design off the vinyl. The transformation it added to the desk front was truly impressive. While I had to apply more pressure than anticipated, the great thing about the transfer is that if some parts remain on the vinyl, you can reposition it on your piece and continue rubbing until it comes off. I was unsure about how the black florals would stand out against the black paint, but I am delighted with the damask-like illusion it creates. I sealed it with two coats of Big Top sealer for added protection.

✨PRO TIP: You don't have to use the transfer design as is. Cut the portions you want and position in other ways. I have several pieces of this design left to use on other projects.
Moving to the side proved to be challenging, as that was where I intended to affix the peacock design. Despite my efforts to rub it on, some parts of the design refused to adhere to the paint. I rubbed vigorously, causing the paint to peel off since it hadn't fully cured. Initially, I considered filling in the gaps with artist's paint, but ultimately decided to view it as a learning opportunity and paint over it. I suspect there may have been residual furniture wax or similar substance on the side, or perhaps it was a different type of wood finish than the front. With the damaged transfer now concealed under an additional coat of paint, it's as if it was never there! Although I was disappointed due to the transfer's cost, I've also realized the importance of adapting to unforeseen circumstances and embracing plan B. In this instance, it turned out to be a happy mistake, as I now believe for this piece less is more!
AFTER: The Rub and Buff distressing brings out the details and curves. I sealed with Big Top after applying.


To enhance the curves and intricate features of the molding and hardware, I used my finger to apply the rub and buff , gently gliding over the desired distressed areas. Once it dried, I then coated those sections with Big Top for added protection.
✨PRO TIP:Don't assume you always need to replace dated original hardware. Save money by transforming them with paint and Rub 'n Buff, which comes in various metallic colors. You can even apply transfers on hardware.
Having planned to remove the hutch portion, I asked Mr. Thrifty to inspect it thoroughly to determine the best way to proceed. I had to rethink my plans once more when we realized that removing the top would be quite challenging! Initially, I wanted to hide the contents of the hutch since I planned on using it for storage purposes. I considered options like frosted privacy film, peel-and-stick wallpaper, and even gallery glass. I aborted the gallery glass idea quickly, realizing it would look dull without light from within. After brainstorming, I decided to embrace the display and enhance it to match the sophisticated and elegant look of the bottom desk.
DURING: Working on the top. No tape required because the paper slipped right underneath. A little paint did get on the glass but was easily removed with a razor blade.


For protection I placed paper to shield the glass during painting, and luckily it slid smoothly beneath the mullions, which I painted with a small brush. I experimented with the original knobs, first coating them with rub and buff, but eventually opted to give it a more contemporary look by installing a set of modern gold handles. I distressed and sealed the exterior and top in the same manner as the bottom, reattaching the finial with wood glue.

With the exterior completed, it was time to focus on the interior. After removing, painting, and sealing the interior and shelves, and allowing them to dry for 24 hours, I applied gold leafing using Mod Podge with a foam brush. While you could also utilize glue specifically designed for gold leaf, I chose the most cost-effective option available, which I happened to have on hand. If you are new to working with this material, there is a learning curve to navigate, as the leafing is delicate and adheres wherever glue is present. The appeal of this product lies in its ability to introduce a touch of drama without requiring perfection. It may wrinkle, develop voids, and flake off, but these imperfections contribute to its organic appearance. Although it can be messy, save the flakes for other projects or to fill in larger voids.


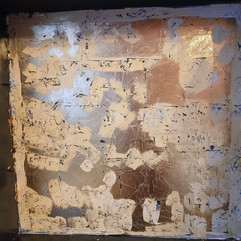
DURING: The gold leaf process. Apply glue, let get tacky, CAREFULLY apply gold sheets. The last picture you can see where I applied the glue as sealer before applying it to the entire piece.

After the gold leaf has completely dried (wait for 24 hours), you will need to seal it to prevent flaking. I tested both the Big Top and Mod Podge on a scrap piece of paper to compare their shine. Although they both maintained the metallic appearance and had only a slight difference in sheen, I opted for Mod Podge. Initially, I only applied it to areas susceptible to flaking, but upon drying, I could see the distinction, so I covered the entire interior with a coat of Mod Podge. I am delighted with the depth and drama it adds to this piece!


AFTER: The interior after sealing and applying shelves, and my new modern knobs!
Currently, the insides of the drawers are in their natural state, but I plan to enhance them by adding fabric or wallpaper liners and painting the external sides of the drawers. If you have never considered using fabric for drawers, be sure to take a look at my previous project utilizing fabric here. If I encounter any lingering odors I'll spray with OdorBan, but so far I haven't noticed any. Here are a few options I'm contemplating for the drawers – which one do you prefer?
Wallpaper liner Fabric liner


Since I didn't plan on keeping the hutch as is, I'm now having trouble styling the inside. The doors block the view when closed, making it tricky. I've been hitting up thrift stores to find unique pieces to display, and I might just leave the doors open to show off all my hard work. What do you think - open or closed once styled? Comment below 👇
This project was immensely satisfying, and I'm thrilled with the results. It's also the inspiration for the other thrifted furniture pieces in my dining room, so subscribe to see those future projects and my (in progress) dining room makeover. I give a few hints in this Facebook post 😉

AFTER: You can't even see the hole for the cord in the left hand cubby.


AFTER: The transfer after sealing. The black on black portions are reminiscent of damask.


If you're interested in taking on a project like this, my suggestion is to jump right in! To keep costs low, consider creating your own chalk paint (recipe in a future post!) and looking into these cost-effective transfer choices. I hope I've encouraged you to take a chance and breathe new life into an old furniture piece and make it uniquely your own. 💖

Revamped one already? Feel free to share your own revamped secretary desk - I find inspiration in seeing others' creations!
As an Amazon Associate, I earn from qualifying purchases.

Comments